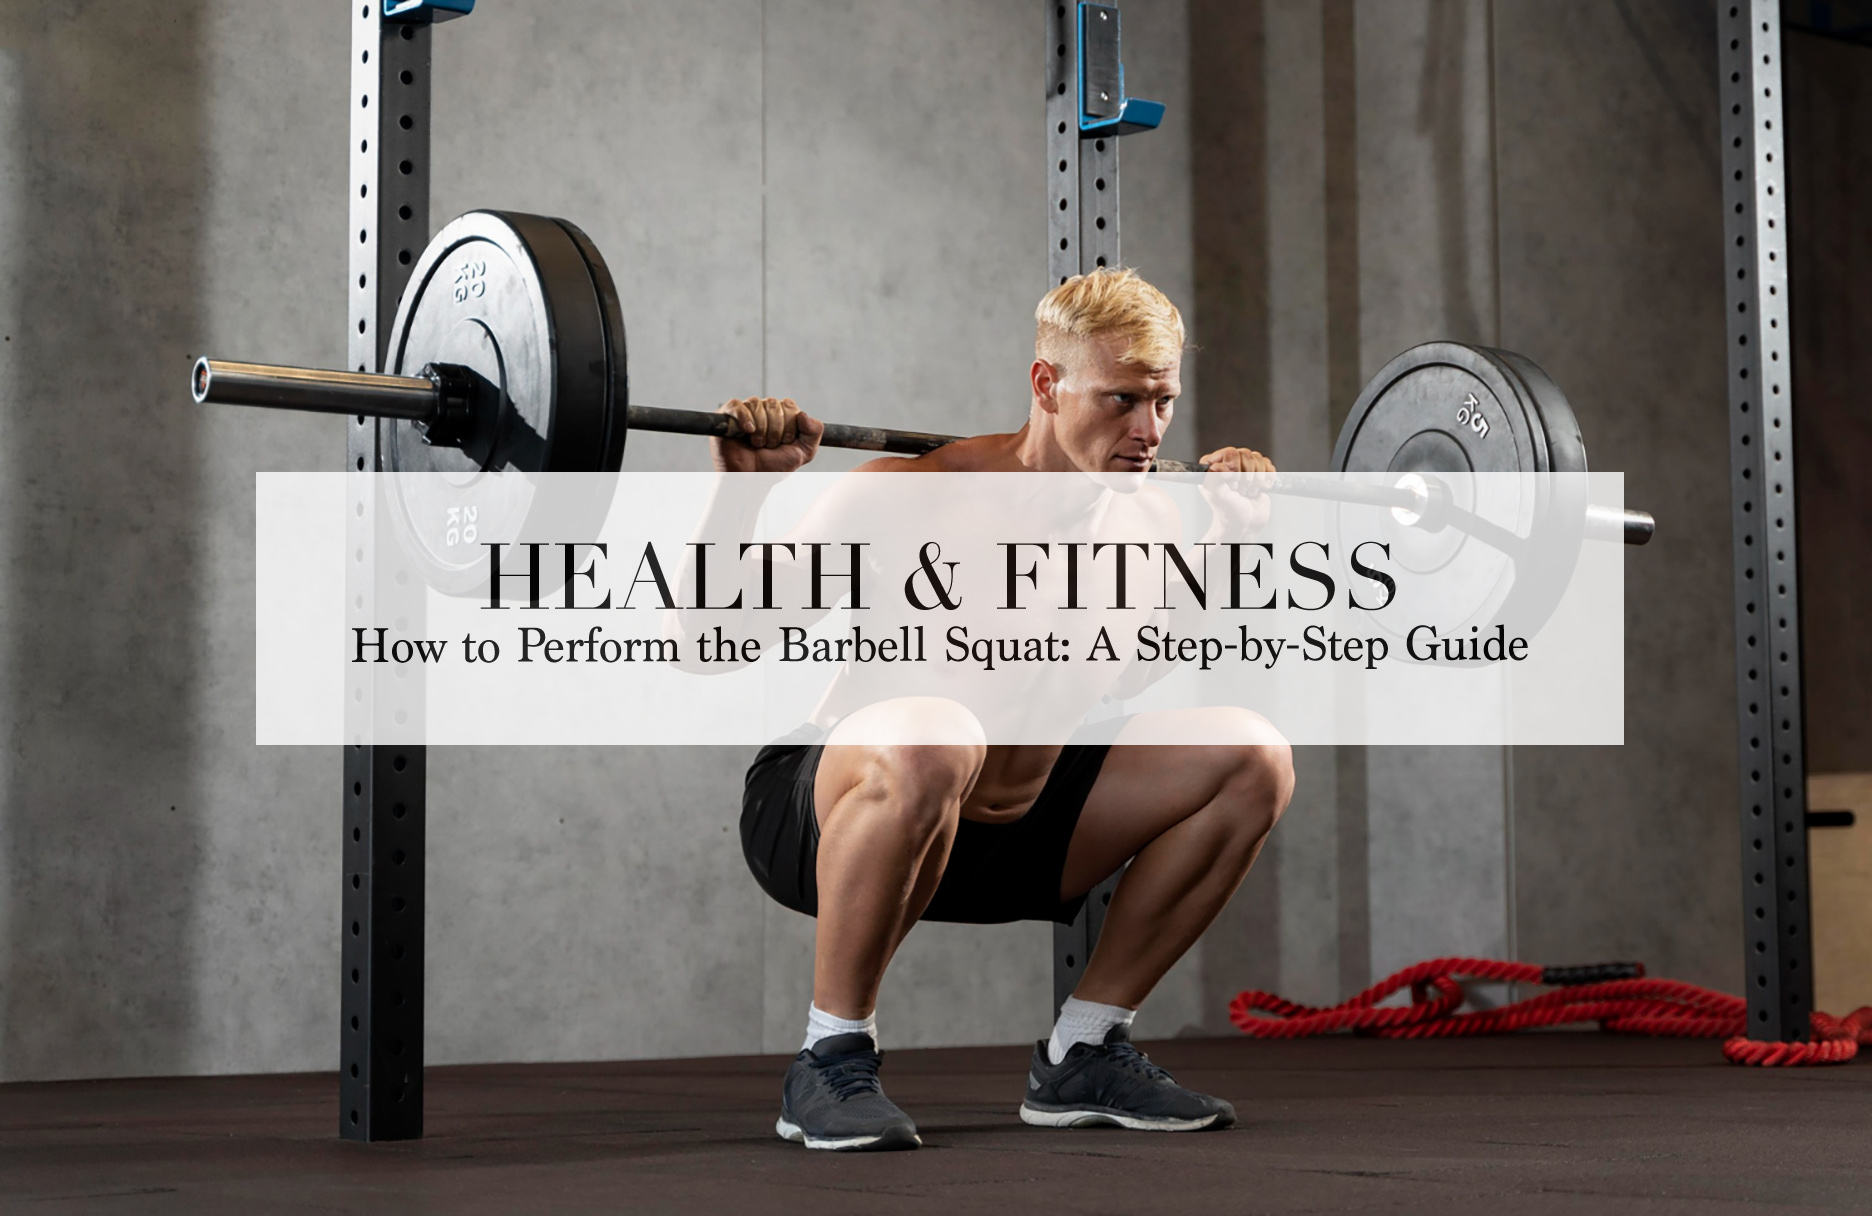
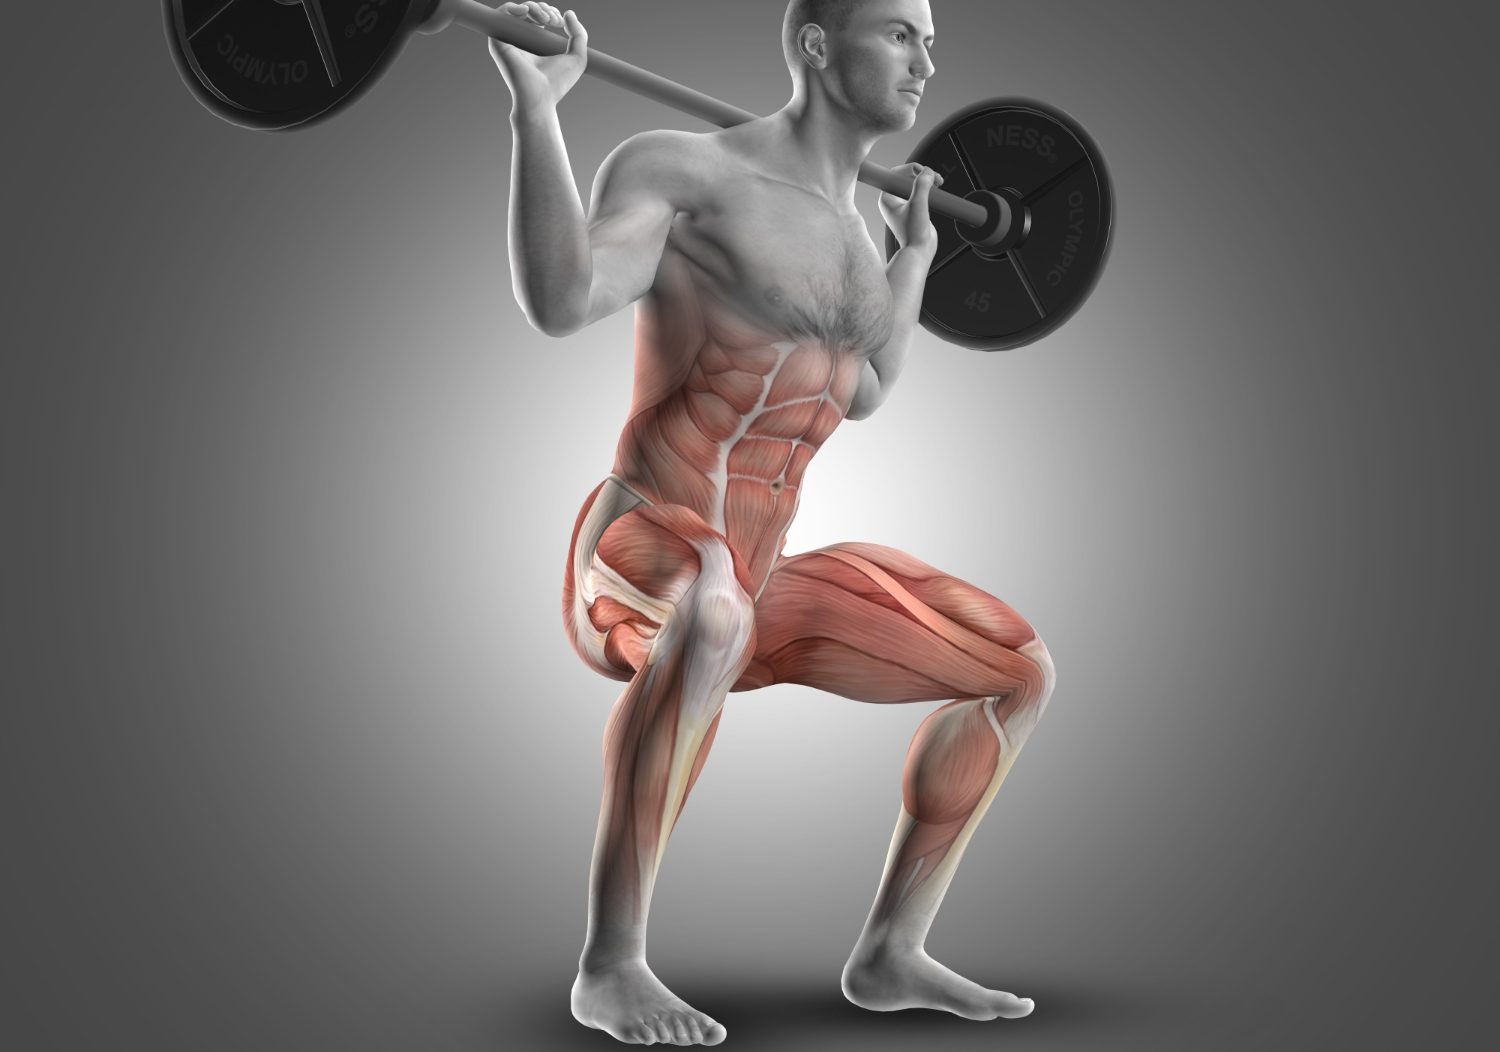
The barbell squat is one of the most fundamental and effective exercises in fitness, muscle growth and development. It primarily targets the muscles in your lower body, including the quadriceps, hamstrings, glutes, and calves, while also engaging the core and lower back. Mastering the squat can significantly enhance your overall strength, stability, and muscle growth. This step-by-step guide will provide you with the necessary knowledge to perform the squat correctly, ensuring you maximise its benefits while minimising the risk of injury.
Step 1: Preparation and Warm-Up
1.1 Warm-Up Routine
Before attempting any squats, it’s crucial to warm up your muscles and joints to prevent injuries and improve performance. A proper warm-up should last about 10-15 minutes and include:
- Cardio Exercise: Start with 5-10 minutes of light cardio such as jogging, cycling, or skipping. This increases your heart rate and blood flow to the muscles.
- Dynamic Stretches: Perform dynamic stretches like leg swings, hip circles, and lunges to increase the range of motion in your hips, knees, and ankles.
- Activation Exercises: Engage in activation exercises such as glute bridges or bodyweight squats to prime your muscles for the workout ahead.
Step 2: Setting Up the Squat
2.1 Equipment Check
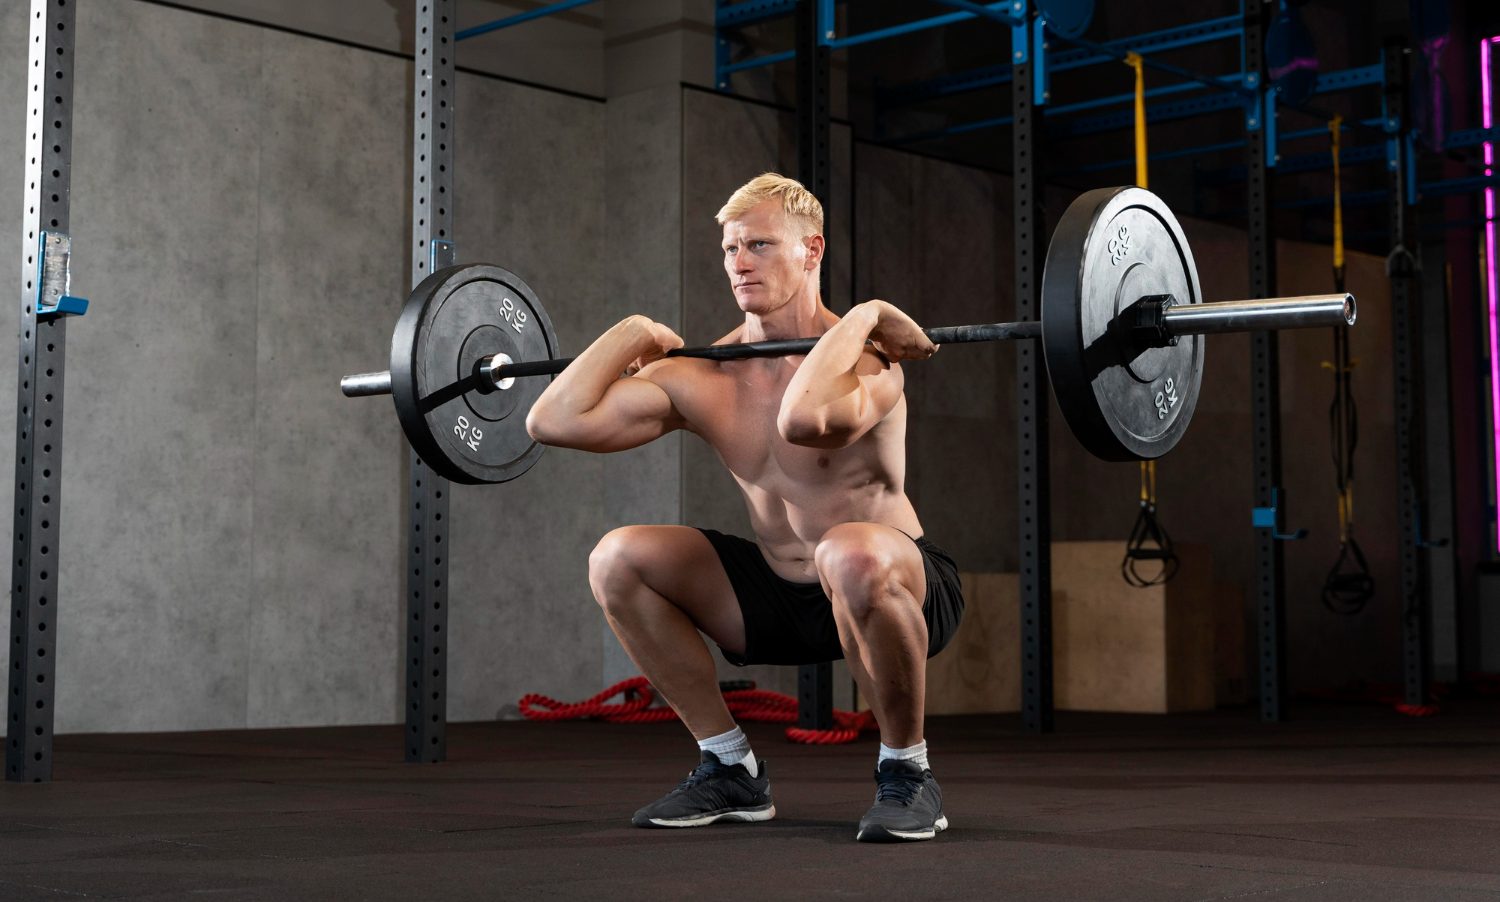
Depending on the type of squat you are performing, ensure you have the appropriate equipment. For a barbell back squat, you’ll need a squat rack, barbell, and weights. Ensure the equipment is in good condition and set up correctly.
2.2 Stance and Positioning
- Foot Position: Stand with your feet shoulder-width apart or slightly wider, with your toes pointed slightly outward (about 15-30 degrees). This stance provides stability and allows for a deeper squat.
- Barbell Position: If using a barbell, position it evenly across your upper back, resting on the trapezius muscles. Ensure the barbell is not on your neck. Grip the bar firmly with your hands slightly wider than shoulder-width apart.
Step 3: The Descent (Eccentric Phase)
3.1 Engaging Your Core
Before you begin the descent, brace your core by taking a deep breath and tightening your abdominal muscles. This creates intra-abdominal pressure, providing support to your spine and helping maintain proper form.
3.2 Initiating the Squat
- Hip Hinge: Start the movement by pushing your hips back slightly as if you are about to sit in a chair. This helps in maintaining balance and reduces stress on your knees.
- Knee Bend: Simultaneously bend your knees, ensuring they track in line with your toes. Avoid allowing your knees to cave inward, as this can cause injury.
- Maintaining Alignment: Keep your chest up, shoulders back, and back straight throughout the movement. Your gaze should be forward or slightly upward to help maintain an upright torso.
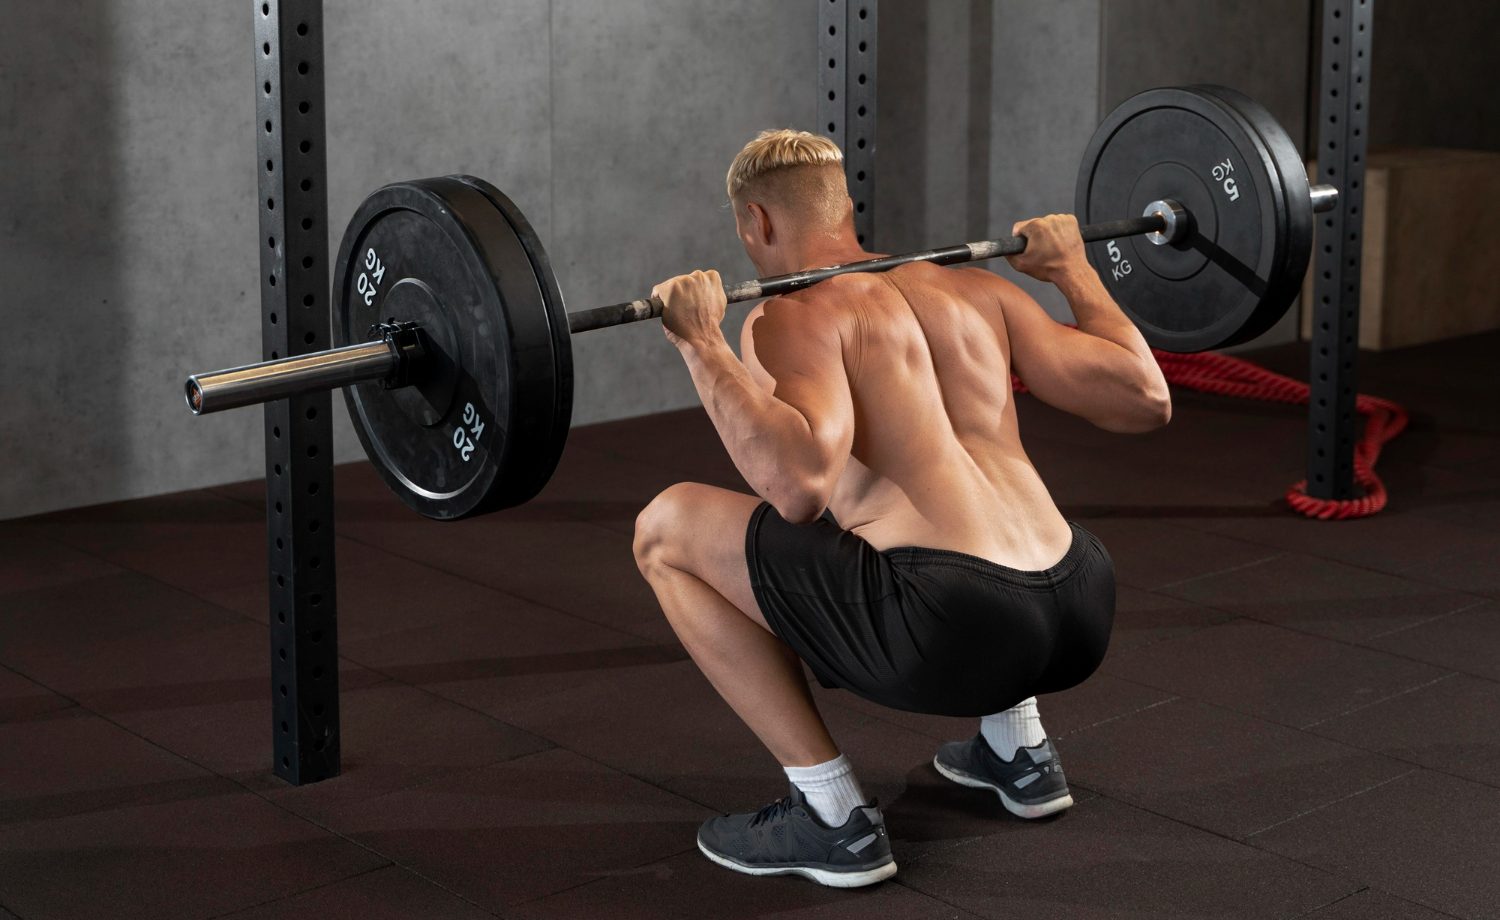
3.3 Depth of Squat
- Lowering: Continue descending until your thighs are at least parallel to the ground. If flexibility and mobility allow, aim for a deeper squat where your hip crease is below your knee level. However, do not sacrifice form for depth.
- Knee Position: Ensure that your knees do not travel too far forward past your toes. Your weight should be evenly distributed across your feet, with a slight emphasis on the heels.
Step 4: The Ascent (Concentric Phase)
4.1 Driving Up
- Initiating the Ascent: Drive through your heels to initiate the upward movement. This engages your glutes and hamstrings effectively.
- Hip and Knee Extension: Extend your hips and knees simultaneously while maintaining a strong core and upright torso. Avoid locking out your knees forcefully at the top.
4.2 Maintaining Form
- Core Engagement: Keep your core engaged throughout the ascent to support your spine and maintain balance.
- Breathing: Exhale steadily as you rise, ensuring you do not hold your breath for too long.
Step 5: Repetition and Sets
5.1 Repetition Range
- Strength Training: For building strength, aim for 3-5 sets of 4-6 reps with heavier weights.
- Hypertrophy: For muscle growth, perform 3-4 sets of 8-12 reps with moderate weights.
- Endurance: For muscular endurance, do 2-3 sets of 15-20 reps with lighter weights.
5.2 Rest Between Sets
- Strength: Rest for 2-3 minutes between sets to allow for full recovery.
- Hypertrophy: Rest for 1-2 minutes to keep the muscles engaged.
- Endurance: Rest for 30-60 seconds to maintain a higher heart rate and endurance.
Step 6: Common Mistakes and How to Avoid Them
6.1 Improper Form
- Rounded Back: Keep your back straight and chest up to avoid rounding your spine, which can lead to injury.
- Knee Valgus: Prevent your knees from caving inward by ensuring they track in line with your toes. Strengthen your hip abductors and practice proper form to correct this issue.
6.2 Insufficient Depth
- Partial Squats: Aim for full range of motion to maximise muscle engagement. Work on flexibility and mobility to improve squat depth.
- Weight Distribution: Ensure your weight is balanced and not shifting too much to the toes or heels.
6.3 Overloading
- Excessive Weight: Use a weight that allows you to maintain proper form throughout the movement. Gradually increase the load as you get stronger.
6.4 Inconsistent Breathing
- Holding Breath: Remember to breathe steadily throughout the squat. Inhale before descending and exhale as you ascend.
Step 7: Variations of the Squat
7.1 Bodyweight Squat
Ideal for beginners, the bodyweight squat helps you master the form without any added weight. Focus on technique and depth.
7.2 Goblet Squat
Holding a dumbbell or kettlebell close to your chest, the goblet squat helps improve form and adds resistance. It’s particularly useful for those who struggle with back squats.
7.3 Front Squat
With the barbell placed in front of your shoulders, the front squat emphasises the quadriceps and requires a strong core. It’s a great variation for those looking to shift the focus from the posterior chain to the anterior muscles.
7.4 Overhead Squat
This advanced variation involves holding a barbell overhead while squatting. It requires excellent mobility, stability, and coordination, and it heavily engages the shoulders and core.
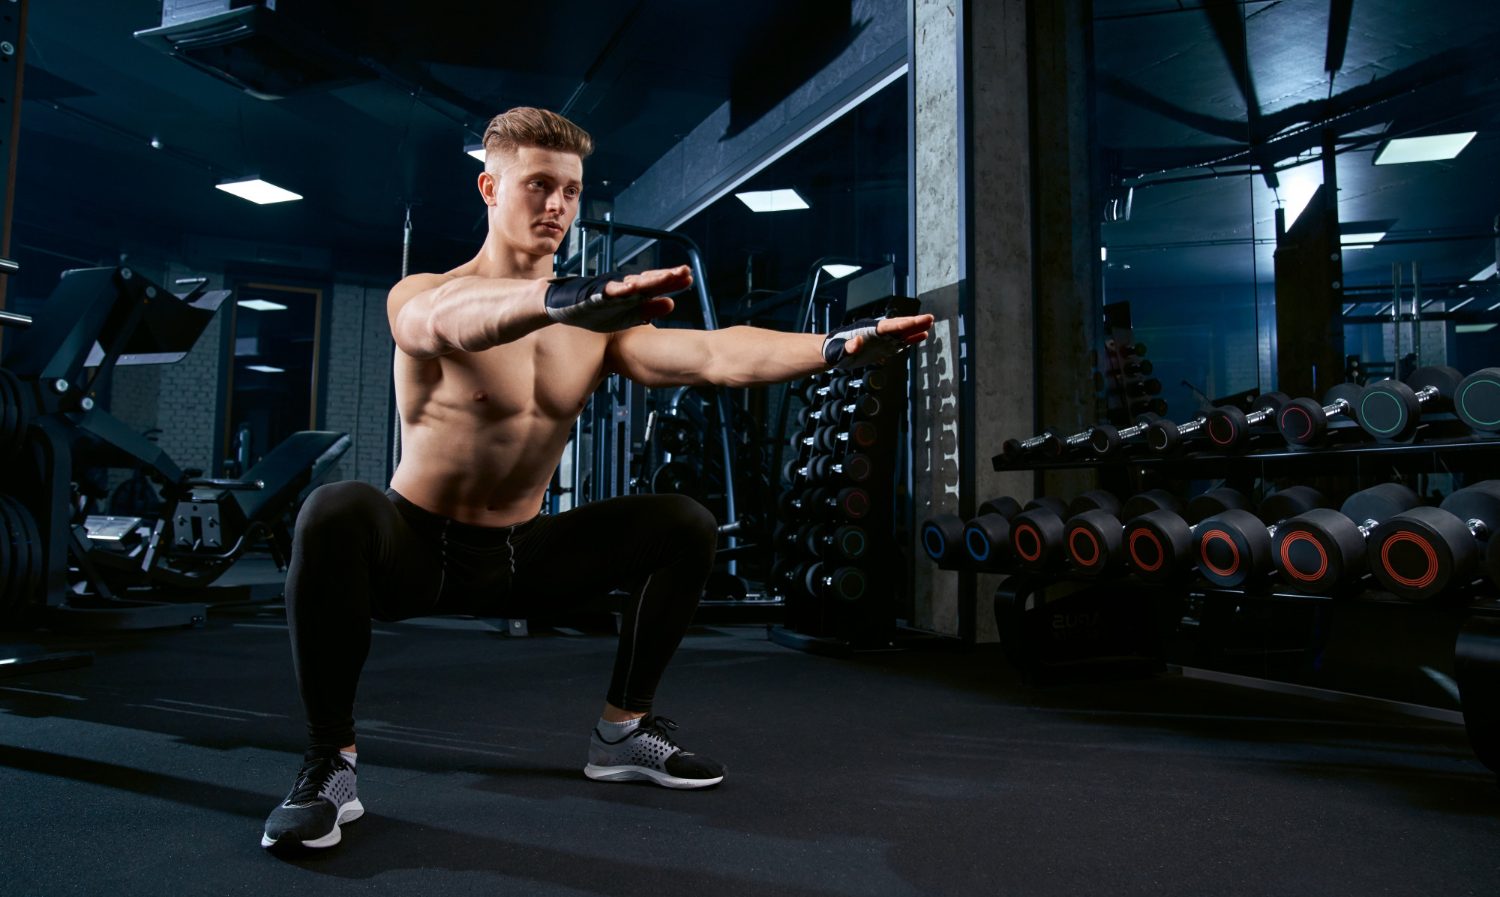
7.5 Split Squat
The split squat, or Bulgarian split squat, involves placing one foot behind you on a bench while squatting with the other leg. It targets the quads and glutes while also improving balance and unilateral strength.
Step 8: Cool Down and Recovery
8.1 Cool Down Routine
After completing your squat workout, it’s important to cool down to aid in recovery and prevent stiffness:
- Static Stretching: Perform static stretches focusing on the quadriceps, hamstrings, glutes, and calves. Hold each stretch for 20-30 seconds.
- Foam Rolling: Use a foam roller to massage and release tension in the muscles worked during the squats.
- Hydration and Nutrition: Rehydrate and consume a balanced meal or protein shake to support muscle recovery.
8.2 Rest and Recovery
- Rest Days: Allow adequate rest days between heavy squat sessions to prevent overtraining and promote muscle growth.
- Sleep: Ensure you get 7-9 hours of quality sleep each night to support recovery and performance.
The barbell squat is a powerful exercise that offers numerous benefits when performed correctly. By following this step-by-step guide, you can master the barbell squat, enhance your lower body strength, and minimise the risk of injury. Remember, consistency and proper form are key to making progress. Whether you’re a beginner or an advanced lifter, incorporating squats into your fitness routine will undoubtedly contribute to your overall strength and muscle development. Happy squatting!